A sloped backyard can feel like a curse at first glance, water runoff, limited usable space, and erosion headaches. But those same challenges create opportunities for multi-level gardens, dramatic water features, and terraced entertaining zones that flat yards simply can’t replicate. The key is working with gravity instead of fighting it, using retaining structures, strategic plantings, and hardscaping that turns elevation change into visual interest. This guide walks through proven techniques for transforming hilly terrain into functional, beautiful outdoor space, with realistic talk about what requires professional help and what a confident DIYer can tackle over a few weekends.
Table of Contents
ToggleKey Takeaways
- Hilly backyard landscaping transforms slopes into multi-level gardens and entertaining zones by working with gravity rather than against it through terracing and strategic plantings.
- Terracing with retaining walls increases usable square footage while improving natural drainage, with timber walls suited for slopes under 2 feet and stone/concrete systems handling up to 4 feet.
- Native ground covers like creeping juniper and native grasses prevent erosion more effectively than mulch alone when combined with biodegradable erosion control blankets.
- Switchback pathways and natural stone steps with proper drainage prevent water damage and create safer, more accessible routes through sloped terrain.
- Gravity-fed water features such as recirculating streams and pondless waterfalls require less pump power and integrate naturally into hilly landscapes while reducing mosquito issues.
- Multi-level terraced patios create distinct outdoor rooms for different activities, with proper base preparation and edge restraints essential to prevent slippage on slopes.
Why Hilly Backyards Are Hidden Design Opportunities
Slopes force designers to think vertically, creating natural sight lines and distinct zones without fences or hedges. A 15-degree grade becomes a rock garden showcase. A 30-degree pitch justifies terraced vegetable beds with better drainage than any flat plot. Even erosion-prone clay banks can host native grasses that need zero irrigation once established.
The practical wins matter just as much. Terracing increases usable square footage by carving flat zones into the hillside. Natural drainage often eliminates the standing water problems that plague level yards. And multi-level layouts create microclimates, a shaded lower patio stays cool while an upper deck catches afternoon sun.
That said, slopes steeper than about 33% (roughly 18 degrees) usually require engineered retaining walls and proper drainage systems. If the yard shows active erosion, cracking soil, or water pooling against the foundation, consult a landscape architect or civil engineer before moving dirt. Most local building departments require permits for retaining walls over 4 feet tall or any structure supporting a building.
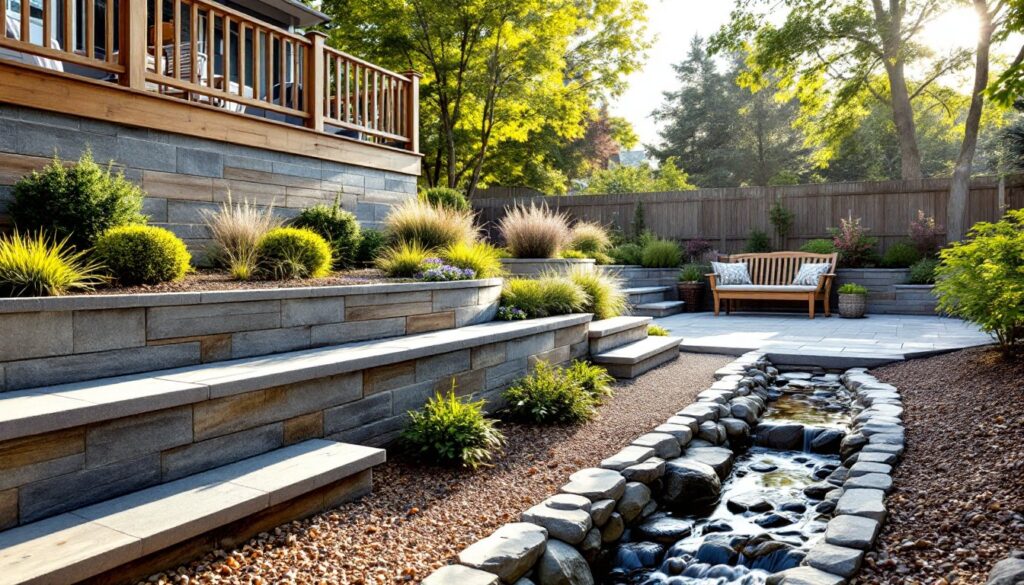
Terracing and Retaining Walls for Functional Beauty
Terracing converts a slope into stair-step planting beds or living areas, held in place by retaining walls. The wall material depends on height, budget, and aesthetic goals. Timber walls (using 6×6 pressure-treated landscape timbers) work well for walls under 2 feet and cost $15–$25 per linear foot in materials. Secure them with ½-inch rebar driven through pre-drilled holes into the slope.
Concrete block or mortarless stone systems like Versa-Lok handle walls up to 3–4 feet. These interlock without mortar and include built-in drainage channels, critical for preventing hydrostatic pressure that can buckle walls. Expect $25–$50 per square foot installed, or half that for DIY work. Always excavate a level trench below the frost line (check local frost depth: it’s 12–18 inches in much of the southern U.S., 36–48 inches in the northern tier) and lay ¾-inch crushed stone as a base.
For walls over 4 feet, poured concrete or engineered boulder walls require professional design. These need proper footings, weep holes every 4–6 feet, and often geogrid reinforcement anchored into the hillside. Don’t skip the perforated drain pipe along the backside of any retaining wall, wrapped in landscape fabric and backfilled with gravel, it prevents water buildup that causes wall failure.
Terrace depth depends on use. A 6-foot-deep terrace gives enough room for a bistro table and chairs. Planting beds can be as shallow as 18 inches if the wall provides the necessary soil depth.
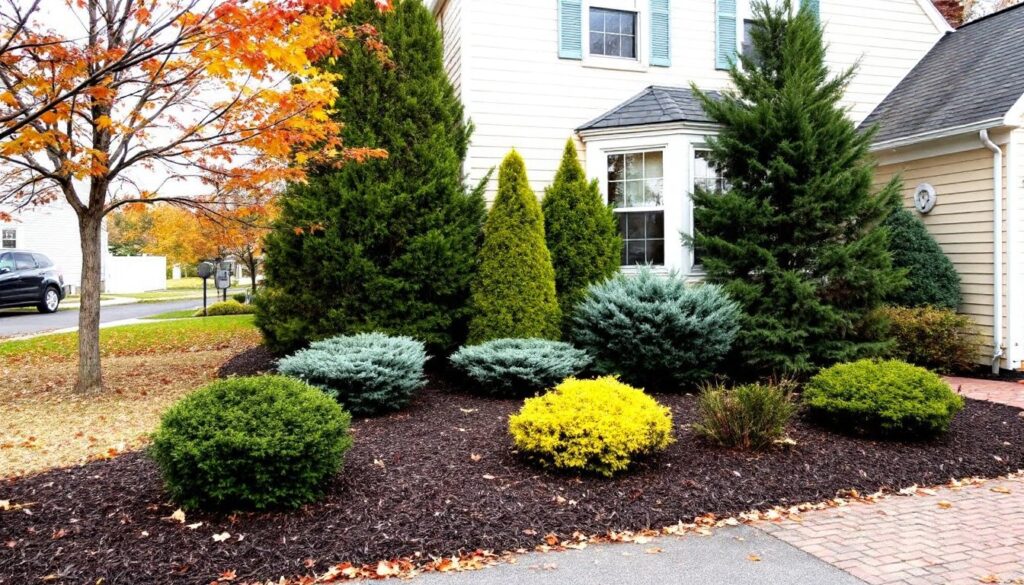
Ground Cover Plants That Prevent Erosion While Looking Gorgeous
Root systems are the cheapest, lowest-maintenance erosion control available. The right ground covers spread quickly, hold soil in place during heavy rain, and choke out weeds. For sunny slopes, creeping juniper (Juniperus horizontalis) tolerates poor soil and drought once established, spreading 6–8 feet wide with minimal height. Creeping phlox delivers spring color in zones 3–9 and roots aggressively.
In partial shade, pachysandra and vinca minor (periwinkle) naturalize fast but can become invasive, check local extension service recommendations before planting. Liriope (lilyturf) handles shade or sun, grows in clumps that knit together, and needs zero maintenance beyond an annual spring mowing to remove dead foliage.
For steeper banks, combine ground covers with erosion control blankets, biodegradable jute or coir mesh stapled to the slope with 6-inch landscape staples every 12–18 inches. The blanket holds soil while plants establish, then decomposes. This combo works better than mulch alone, which tends to wash downhill.
Native grasses like switchgrass or little bluestem develop deep root systems (3–6 feet) that stabilize slopes better than shallow-rooted turf. They also require no fertilizer or supplemental water after the first season. Plant in spring or early fall, spacing plugs 12–18 inches apart, and keep them watered for 6–8 weeks while roots establish.
Creating Winding Pathways and Natural Stone Steps
Straight paths fight the slope: switchback paths work with it. A gentle 4–8% grade (about ½ inch per foot) lets rainwater sheet off without creating rivulets. For steeper sections, wide steps or landings every 10–15 feet give users a rest and reduce the perceived climb.
Flagstone or irregular bluestone set in decomposed granite or gravel creates a naturalistic path that drains well. Lay stones on 2–3 inches of compacted crushed stone, not directly on soil (they’ll shift and settle unevenly). Leave ½-inch joints between stones and sweep polymeric sand into gaps if you want a more finished look that resists weed growth.
For steps, 6-inch-thick natural stone treads (bluestone, limestone, or sandstone) provide durable footing. Each tread should be at least 14 inches deep (front to back) and 36–48 inches wide for comfortable two-person passage. Risers (the vertical face) typically run 5–7 inches tall. Anchor treads into the slope with rebar or set them into a 4-inch crushed stone base, tamped firm with a plate compactor (rent one for $60–$90 per day).
Timber or steel edge restraints keep gravel paths from migrating downhill. Stake them every 3 feet with 12-inch landscape spikes. For higher-traffic areas or accessibility needs, poured concrete or pavers may work better, but they require more extensive base prep and better drainage planning to prevent frost heave or washouts.
Water Features That Work With Your Slope
Gravity-fed water features on slopes look natural and often require less pump power than flat-yard installations. A recirculating stream can cascade through planted terraces, with the pump at the lowest pond recirculating water to a hidden reservoir at the top. Use flexible PVC or kink-free tubing (1–1.5 inches diameter for most residential streams) buried alongside or under the streambed.
Line the stream channel with 45-mil EPDM pond liner, overlapping seams by at least 6 inches and sealing with pond liner tape. Edge with rounded river rock or flagstone to hide liner edges. Calculate flow rate based on stream width: a 6-inch-wide stream needs about 150 gallons per hour (GPH): a 12-inch stream wants 300–500 GPH. Size the pump accordingly (most small submersible pumps run $80–$200).
Pondless waterfalls suit slopes well, the water disappears into a gravel-filled basin at the base, reducing maintenance and eliminating standing water (a plus in mosquito-prone areas or homes with small kids). Dig a basin roughly 2 feet deep and 3 feet wide, line it with landscape fabric and liner, then fill with river rock over a plastic reservoir vault.
Always run a dedicated GFCI-protected outdoor outlet for the pump. Bury electrical lines at least 18 inches deep in conduit if crossing lawn or garden areas (local electrical codes vary: some jurisdictions require 24 inches). If you’re not comfortable with outdoor electrical work, hire a licensed electrician for that portion.
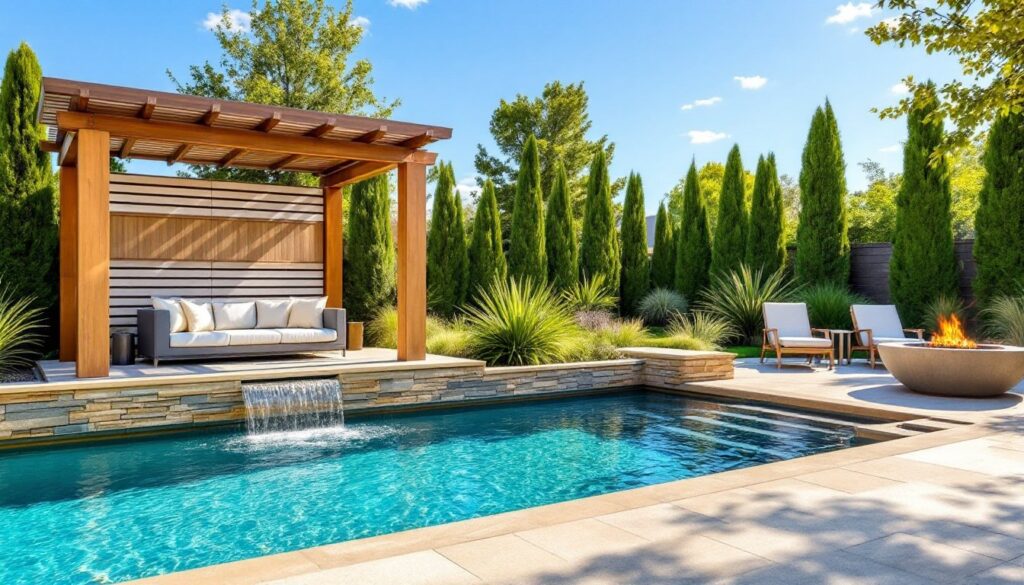
Multi-Level Entertaining Spaces and Seating Areas
Terraced patios break a sloped yard into distinct rooms, a grilling zone on the upper level, fire pit seating mid-slope, and a shaded lounge at the bottom. Each level needs a flat, stable base. For a gravel patio, excavate to consistent depth (typically 4–6 inches), lay landscape fabric to block weeds, add 3–4 inches of compacted ¾-inch crushed stone, then top with 1–2 inches of pea gravel or decomposed granite. Compact each layer with a plate tamper.
Paver patios on slopes require extra attention to base prep and edge restraint. The base should extend at least 6 inches beyond the finished paver edge on the downhill side to prevent slippage. Install a buried edge restraint (plastic, aluminum, or steel) and backfill with soil. Slope the paver surface ¼ inch per foot away from any structures for drainage.
Built-in seating, stone benches or timber-framed planters with cap seating, maximizes space without cluttering small terraces with furniture. Use the same materials as retaining walls for visual continuity. Pressure-treated 2×10 or 2×12 lumber works for bench tops: seal or stain it to resist weathering.
For evening use, add low-voltage landscape lighting along steps and path edges (12V systems are DIY-friendly and much safer than 120V). Solar path lights work in sunny spots but often lack the brightness needed for steps, hardwired LEDs provide reliable, long-lasting illumination. Bury low-voltage cable 6 inches deep to protect it from shovels and edgers.
Conclusion
A sloped backyard isn’t a limitation, it’s a framework for layered gardens, dramatic focal points, and usable outdoor rooms that flat lots can’t match. Start with erosion control and proper drainage, then build out terraces, paths, and plantings that turn elevation into an asset. The work takes planning and some sweat equity, but the result is a landscape with depth, character, and functionality that increases property value and daily enjoyment.