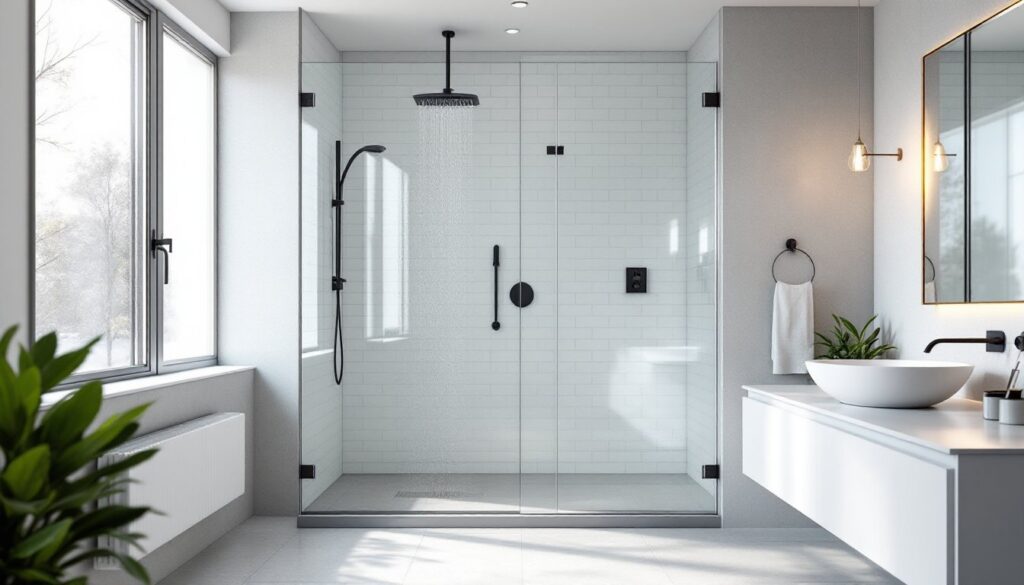
Walk-in glass showers have become the centerpiece of modern bathroom renovations, and for good reason. They replace the cramped, dated feeling of a shower-tub combo or frosted fiberglass enclosure with an open, spa-like experience that makes even a modest bathroom feel larger and brighter. Unlike traditional shower stalls with metal frames and opaque panels, a walk-in glass shower uses clear or lightly textured glass panels to create a seamless transition from the bathroom floor into the shower zone. It’s a straightforward upgrade that delivers both aesthetic impact and practical benefits, but only if it’s planned and installed correctly.
Table of Contents
ToggleKey Takeaways
- A walk-in glass shower creates a spa-like, open feel that visually expands bathrooms and eliminates the cramped appearance of traditional shower enclosures.
- Walk-in glass showers provide accessibility benefits with curbless entry, making them ideal for aging-in-place designs and reducing fall risks without raised thresholds.
- Frameless walk-in shower glass panels require heavy-duty tempered glass (3/8 inch minimum) and precision installation, while framed options use thinner glass and are more forgiving but visually busier.
- Clear or low-iron glass paired with hydrophobic coatings reduces water spots and cleaning time, though coatings add $100–$300 to the cost but cut maintenance significantly.
- Professional installation is essential due to complex waterproofing, floor slope, and structural requirements, with total costs ranging from $3,500 for semi-frameless to $15,000+ for fully frameless custom builds.
- Squeegee after each use and weekly non-abrasive cleaning keep glass spotless while protecting hydrophobic coatings, and silicone seals should be inspected every six months to prevent water damage.
What Is a Walk-In Glass Shower?
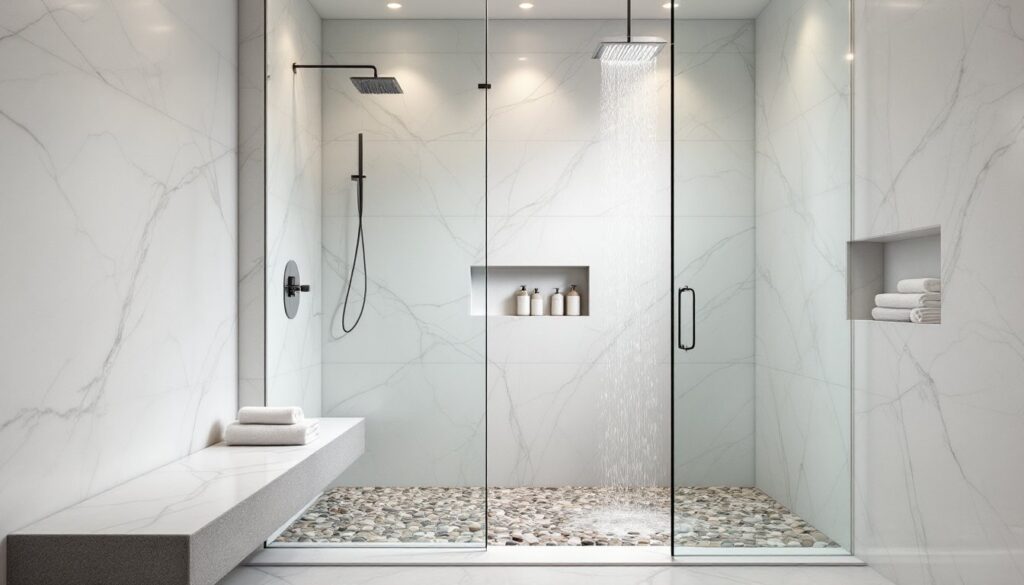
A walk-in glass shower is an enclosure that uses large glass panels instead of curtains, prefab stalls, or fully framed doors. The defining feature is the absence of a raised threshold or step, the shower floor is flush or nearly flush with the bathroom floor, allowing someone to literally walk in. Most designs incorporate a low-profile or curbless shower pan with a linear drain to manage water without a curb.
The glass itself is typically tempered safety glass, heat-treated to shatter into small, blunt pieces rather than sharp shards if broken. Panels can be mounted directly to walls, suspended from a ceiling rail, or supported by minimal metal brackets (sometimes called U-channels or clamps). The goal is to maximize transparency and minimize visible hardware.
Walk-in configurations vary widely. Some are fully enclosed with a hinged or sliding door, while others are “open concept” with one or two fixed panels and no door at all, relying on strategic placement of the showerhead and proper slope to keep water contained. The latter works best in larger bathrooms where splash zone doesn’t matter, but it requires careful planning of drain placement and slope (typically 1/4 inch per foot toward the drain).
Benefits of Installing a Walk-In Glass Shower
The first and most obvious benefit is visual expansion. Clear glass doesn’t chop the room into segments, so sightlines extend all the way to the back wall. A small 5×8-foot bathroom can feel noticeably larger when the shower enclosure isn’t hidden behind a curtain or opaque door.
Accessibility is another major advantage. A curbless entry makes the shower usable for aging-in-place scenarios, wheelchair users, or anyone recovering from surgery. There’s no 6-inch step to navigate, which reduces fall risk. This is why many universal design guidelines and ADA-compliant remodels specify walk-in showers.
Cleaning and maintenance are simpler than with framed enclosures. Frameless walk in shower glass has fewer metal channels and rubber gaskets where mold and soap scum accumulate. A quick squeegee after each use and a weekly wipe-down with a non-abrasive cleaner are usually enough to keep panels sparkling.
Finally, resale value tends to be higher. Buyers in 2026 expect at least one modern, updated bathroom. A well-executed walk-in glass shower signals that the home has been maintained and improved, often recouping a significant portion of installation costs when it’s time to sell.
Popular Walk-In Glass Shower Designs and Styles
Design options range from minimalist single-panel screens to fully enclosed corner units. Here are the most common configurations:
- Single fixed panel (wet room style): One large glass sheet acts as a splash guard. The rest of the shower is open. Works best in spacious bathrooms with floor drains that can handle water migration.
- L-shaped or corner enclosure: Two fixed panels meet at a 90-degree angle, often with a hinged door on one side. Fits neatly into a corner and keeps water well-contained.
- Alcove walk-in: Three walls are tiled, and the entry is a single hinged door or open panel. Efficient use of space in smaller bathrooms.
- Neo-angle: Five-sided design that tucks into a corner, popular in tight spaces where a standard square enclosure would feel cramped.
Frameless vs. Framed Glass Options
Frameless designs use heavy-duty glass (typically 3/8 inch or 1/2 inch thick) with minimal metal hardware, just a few clamps or a narrow U-channel at the base. The result is a clean, modern look with uninterrupted glass. Installation requires precision: the walls must be plumb and the anchoring points need to hit solid blocking or studs, since the glass is heavy (a 3/8-inch panel weighs about 6 pounds per square foot).
Framed or semi-frameless enclosures use thinner glass (often 1/4 inch) supported by aluminum or stainless steel frames around all edges. The frames add structure and can accommodate slight wall irregularities, which makes installation more forgiving. They’re also less expensive, both for materials and labor, but the visible metal can look dated or busy, especially with builder-grade finishes like polished brass or chrome.
Semi-frameless splits the difference: frameless door with minimal framing on fixed panels. It’s a budget-conscious way to get most of the modern look without the cost of a fully frameless system.
Choosing the Right Glass Type and Thickness
Not all shower glass is created equal. The two key decisions are thickness and surface treatment.
Thickness affects both appearance and structural integrity. For frameless installations, 3/8 inch (10 mm) is the minimum recommended thickness, with 1/2 inch (12 mm) being the premium standard. Thicker glass feels more substantial, reduces flexing, and allows for larger unsupported spans. Framed enclosures can use 1/4 inch (6 mm) glass because the frame does the structural work.
As for glass type, tempered safety glass is non-negotiable, it’s required by building codes for shower enclosures. Beyond that, homeowners can choose:
- Clear glass: The most popular. Shows off tilework and keeps the space bright. Does show water spots if not maintained.
- Low-iron (ultra-clear) glass: Removes the greenish tint visible on the edges of standard clear glass. Costs about 20–30% more but looks noticeably crisper.
- Frosted or textured glass: Adds privacy. Rain, frosted, or pebble patterns obscure the view while still letting light through. Popular for shared bathrooms.
- Coated glass: Factory-applied hydrophobic coatings (like EnduroShield or similar) repel water and reduce mineral buildup. Adds $100–$300 to the cost but cuts cleaning time significantly.
Thickness and coatings drive cost more than surface treatments, so it’s worth prioritizing where durability and ease of maintenance matter most.
Installation Considerations and Cost Factors
A walk-in glass shower is not a weekend DIY project for most homeowners. It involves plumbing, waterproofing, tile work, and precision glass installation. Here’s what goes into it.
Structural prep starts with the floor. A curbless or low-profile shower pan requires the subfloor to be recessed or built up, so the finished shower floor can be flush with the bathroom floor. This often means cutting into floor joists or pouring a sloped mortar bed, work that needs to comply with IRC drainage and structural requirements. If the bathroom is on a slab, creating a recessed pan is simpler. On a raised floor, it may require lowering joists or building a step-down platform for the entire bathroom.
Waterproofing is critical. A liquid or sheet membrane (RedGard, Schluter-KERDI, or similar) must cover the entire shower floor and extend at least 6 inches up the walls. Any penetration, drain, valve, showerhead, needs to be sealed with compatible materials. Skipping or rushing this step is the #1 cause of catastrophic shower failures.
Glass fabrication and installation should be done by a professional. Custom glass panels are measured on-site after tile work is complete, then cut and tempered off-site. The installer returns to mount hardware, hang panels, and seal joints with clear silicone. Expect 2–4 weeks lead time for custom glass.
Cost varies widely by region and finish level:
- Materials only (prefab kit, framed, DIY-installed): $800–$1,800
- Professional install, semi-frameless, mid-grade tile: $3,500–$6,500
- Frameless custom glass, premium tile, curbless entry: $8,000–$15,000+
Permits are typically required for any work involving plumbing changes or structural modification to floor joists. Check local codes before starting.
Maintenance Tips for Keeping Your Glass Shower Spotless
Walk in shower glass stays clear longer with a simple routine. After each use, run a squeegee down all panels to remove standing water. This single step prevents 80% of water spots and soap scum buildup.
Weekly, spray glass with a non-abrasive cleaner, either a commercial product designed for glass showers or a DIY mix of equal parts white vinegar and water. Wipe with a microfiber cloth and rinse. Avoid abrasive scrubbers or powders, which can scratch the glass or degrade coatings.
For hard water stains that do develop, a paste of baking soda and water or a dedicated lime remover (CLR, Bar Keepers Friend) can be applied with a soft sponge. Let it sit for a few minutes, then scrub gently and rinse thoroughly.
Check the silicone seals and hardware every six months. If caulk is cracking or discolored, remove the old bead with a utility knife and re-caulk with 100% silicone (not acrylic or latex). Hinges and clamps should be wiped down to prevent mineral buildup that can interfere with door swing.
If the glass has a hydrophobic coating, avoid cleaners with ammonia or bleach, they can degrade the coating. Stick to pH-neutral products and the manufacturer’s care instructions to preserve the finish.